


Well, Guess I was ahead of the game when I created my Molly Summoning cheat Sheet. It seems Ratty decided this was a good idea and created the rest of the Resser summoning cheat sheets. Find them below.


So over the bank holiday weekend I decided to while away some hours playing one of my favourite themed board game – Arkham Horror. For those who are unfamiliar with the game it is a thematic co-operative investigation game, the players working together to figure out the best moves and actions to defeat monsters and ultimately win the game. The board and the monsters work against the players and all monster moves are determined each round. There are literally a tonne of tokens, counters and cards that help to bulk out this game and make every adventure unique. But for me one of the best qualities of the game is that it can be played solo.
So what’s in the box? Well, open the lid and you will find a huge 6-tile board with the locations of Arkham for those familiar with the Cthulhu Mythos. There’s a full-colour 30+ page large format rulebook. Each map sector in Arkham Horror is colour-coded and each colour has a separate card deck for the adventurers to explore and either succeed or fail in their investigations. There are a number of investigator sheets, each one with different stats, allowing players to either randomise or select their favourite investigator. There are card decks for different items in the game – Common Items, Unique Items, Spells and Lores. A huge deck forms the Mythos deck – portals opening over Arkham, monsters moving and environmental and headline conditions. A large amount of monster tokens make up the monster pile and each investigator has their own unique stand up card. A good way to bling out your box is to buy miniatures for each of the investigators. A set of Elder Gods is supplied, each one with unique abilities and effects and every game 1 of these is the main antagonist.
In solo play mode I selected 3 investigators at random and 1 Elder God who is trying to break through into Arkham to destroy all mankind. To win the game the investigators much venture to open portals, investigate and then close them. Closing all open portals immediately ends the game. Closing 6 portals also ends the game. If the Doom Track reaches it’s final point the Elder God wakes and the investigators must do battle with it to win the game.
At the beginning of the game each investigator gets his starting cards and abilities, some are random, some are fixed. This adds yet more randomness and replayability to the game.
This game the investigators will be battling to prevent The King in Yellow from breaking through into Arkham. Each Elder God has some unique abilities. The King in Yellow requires investigators to spend 8 clue tokens rather than the default 5 to close a gate. He also makes cultists tougher and gives them Flight!
Once all characters have been equipped the game begins. A game turn is broken down into phases: Upkeep, Movement, Arkham Encounters, Other World Encounters and Mythos Phase. During Upkeep players ready their exhausted spells, regain stamina or sanity if applicable and earn money. Players can then move their counters along their stat track to alter their Speed,Sneak,Fight,Will,Luck and Lore values.
Movement is next. Players move up to their movement value between different locations in Arkham, trying to pick up clues, avoid monsters and get to certain locations to seal gates. If a player moves into a monster square he can try and evade or fight. If he fights his movement ends for the turn. If he tries to evade he uses his Sneak value modified by the monster’s evade bonus. If a player ends his movement in a space with a clue token he can pick it up and add to his pool.
Those investigators at a location will have an encounter there and pick a card with the same colour and read the encounter matching the location.
Players who end on an open gate will be sucked to that Other World location and will spend 2 turns having encounters there. Once they are returned to Arkham they will have an encounter token placed on them. This is the only way a gate can be closed.
After encounters are completed it’s the Monsters turn! In the Mythos phase a Mythos card is flipped. This card will tell where a gate will open, where a clue will appear, any new environmental conditions or news headlines and lastly which monsters will move and in what direction. All monster tokens have a symbol on them. Certain symbols will appear on the Mythos card in either a white or black box. Those in the white box will move from their current location in the direction of the white arrow and the same for black monsters matching the symbols in the black box.
Once all phases are complete, the turn ends and the first player token is passed to the next player.
Solo play in Arkham Horror requires little adaptation from the core rules. The player simply takes as many or as few investigators as he wishes. The number of investigators will affect certain things in the game – the number of monsters allowed on the board, the speed at which the Terror Track advances and so on. This means in solo play you can control how difficult the game will be which is great for trying the game out, trying new strategies etc.
I love this game solo and it’s a great way to spend 3 hours rolling dice and fighting monsters.


International Tabletop Day 2014
Posted: April 4, 2014 in GeneralTags: Arkham Horror, Guildball, Malifaux
Tomorrow sees the second annual International Tabletop Day. We will be at our local club, Dragonslayers at Queens University. Our plan is run some demo games of Guildball and Malifaux before getting into a meaty game of Arkham Horror.
Check back throughout tomorrow for updates.

A Case in Point
Posted: April 3, 2014 in Hobby, StorageTags: Battlefoam, Games Workshop, KR Multicase
Recently I have had to rearrange all my toys and downsize to co-habitation with my future missus. This means that my vast array of toys in my 3 bedroon gamer’s paradise has had to be sold, sorted and re-stored in a much smaller area.
I have discovered many an old collection of models, from Thousand Sons Terminators converted from regular plastic terminators to Flames of War Panzergrenadiers and tanks half built lying around in shoe boxes. I had a large amount of Forgeworld resin miniatures for Epic:Armageddon that managed to get whittled down significantly on eBay but still I have 4 full races to play with sitting in boxes.
So this has led me to question my storage options and possible solutions. Over the years I have used almost exclusively Games Workshop’s cases and, while suitable for the task, were never very inspiring. Yes, they do come in a range of colours and in 2 different sizes (small and large) and they have since the creation of Apocalypse come out with a giant version.
Like most gamers I like to sort my collections into meaningful sections – all my Bushido models together, my Epic:Armageddon Chaos needs a tray to themselves etc and it’s just a nice warm feeling inside to open a case, look through the painted models all arranged in a nice and complete set. So let’s see what options are out there for a gamer like me:
Games Workshop Cases
So as of the date of this post there are 2 cases available from Games Workshop. The Figure case – a 3 layer foam hard shell case (£36) and the Army Figure case – double the size for 6 layers of foam in a hard shell (£61.50). Both come in a choice of colours as long as it’s black. Each foam tray has space for 36 28mm scale models. The foam can be custom cut to fit any standard small or medium models with the possibility of custom fitting some large models in. The foam itself is very soft and from personal experience loses it’s integrity after a few years. The cases are solid and can withstand significant impact (eg a car crash – don’t ask!) but seem very bulky compared to the foam inside.


KR Multicases
KR is a company I have had no personal experiences with. I have looked at their products and some friends have various styles from them. They began with a basic foam tray and cardboard case. “Cardboard, you say? Wouldn’t that get ruined in the rain?” Yes which is why they also sold a waterproof cover. They were very a much a cheaper alternative to Games Workshop for us old hobbyists and the option of purchasing additional foam trays was a godsend. Something GW does NOT offer.
They then moved out into hard shell cases – black plastic or Aluminium cases offer more protection to your trays and models and fabric cases and backpacks for gamers on the go or wanting other trendy options.
They also cater for specific armies for Games Workshop. If you need a tray to transport your flyer KR have a tray with a cutout to fit.
Their trays are similar in style to GW in a wide range of colours with a soft sponge foam that will hold your models intact.
Prices are very reasonable with empty aluminium cases starting at £25 and custom filled foam for £38 they are a very good value for money.


Battlefoam
Romeo and the guys at Battlefoam burst onto the scene a few years ago and have gone from strength to strength. These are my personal favourite case for a number of reasons but let’s start with the basic bag.
Their P.A.C.K. (Personal Army Combat Kit) is their mainstay transport and storage system. It comes in a range of sizes and a lot of them have extra zips on the outside to allow you to zip together various sizes into 1 huge bag. The bag is a rugged canvas and comes in army green although some sizes have colour options available. The canvas bag has plastic inserts on all the edges to create a hard shell of protection for your models. There are metal clasps for the straps with a good quality rubber shoulder protector with every bag. These can be disconnected when combining bags together.
The foam is where Battlefoam stands out from the crowd. Their foam is harder and denser and more durable than other competitors and their Pick n Pluck variety allows you to pluck out just the right amount of foam to create a space to keep your unusual models safe and secure. The only downside is that with a hard foam there is a tendency for the paint to wear off especially if the models are used often.
I am a big fan of the PACK system but they also have licenses for other Games systems to produce bags for them . From MERCS to Infinity, Malifaux to Flames of War and Heavy Gear the custom bags are created with the game and gamer’s needs at the forefront.
I have had a lot of experience with their Malifaux bags and with 3 layers (1.5″, 1″ and 3″ Pick n Pluck) there is space for an entire faction (or 2 in my case). Their Malifaux bag also has a large pocket on the front for a rulebook and on the back has an entire section for Malifaux decks, tokens and tape measures and some slots for markers. All designed to fit snuggly.
I have been catching myself on looking at the PACK PLUS recently as that will attach to my PACK 216 and give an additional 6″ worth of foam for storage or transport. I can then fill it with whatever foam I like – be it 2″ for my Flames of War or 3″ to hold my tanks for Secrets of the Third Reich. I can then pull out what I don’t need or add in trays if I want to take either a range of games systems or more of 1 army.
Now the downside. The cases come in at the premium end of the market with a Malifaux bag retailing for £65. At the minute they do have an offer on their Malifaux bags but i believe this is to do with licensing coming to an end.
You can order trays separately and they are not cheap either. For me I would rather pay this premium price for a product I am familiar with and will fulfil my needs and can expand as I need it or see fit. And that’s the case in point.
-

-

-

Battlefoam PACK PLUS -

PACK 720 -

-

Battlefoam Malifaux Bag
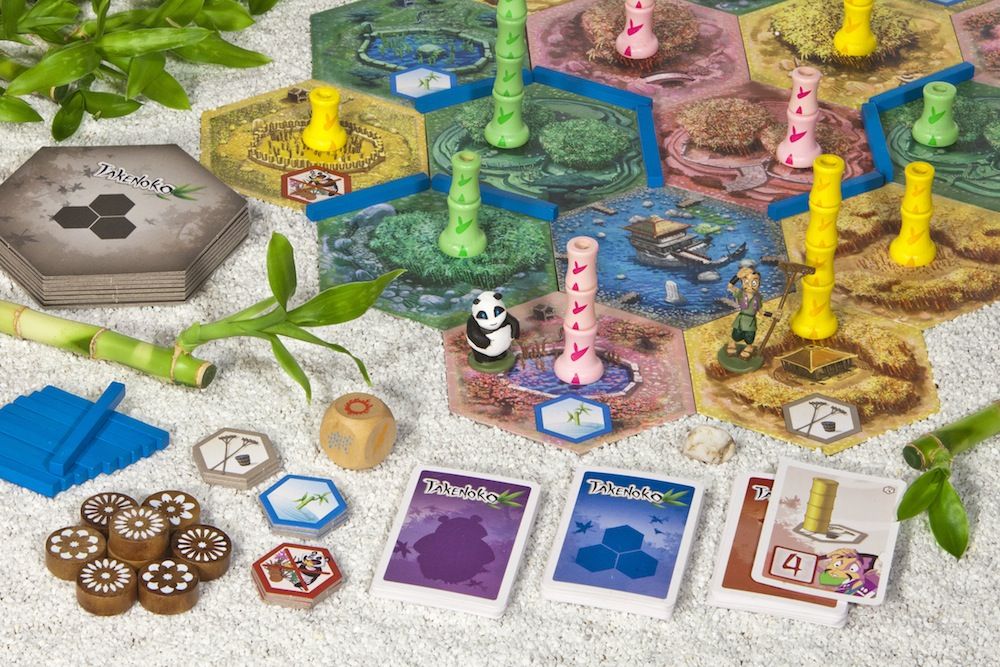
Last night our gaming club got in a truckload of new board games, in particular Firefly, every boxed set of Dominion and one that I had wanted to play for a while – Takenoko.
For those not familiar with this game all players are trying lay different coloured tiles down to grow that colour bamboo forests in the Japanese Imperial Palace in order to keep the Imperial Panda happy. Isn’t that nice? No, the little bugger can sabotage your plans as he can be controlled by the other players to eat different coloured bamboo in order to achieve objectives in the game.
This was our first time playing so we quickly skimmed the rulebook, laid out all the pieces we needed – the starting pond with the Imperial Gardener and the Panda on it. Each player is dealt 1 objective from the 3 categories – Tiles, Panda and Gardener – more about these later and their own playing mat. The mats are great as they give a quick graphical representation of what you can do in the game and what each weather effect has. We shuffled all the coloured tiles and were ready to begin.
During a player turn you roll the weather dice and apply the effects and then decide which 2 of the 5 actions to take. You cannot take the same action again and can complete actions in any order. Some weather conditions allow an extra action or to perform the same action again. Rain allows you to grow a bamboo section in any 1 tile but bamboo cannot grow higher than 4 sections. Clouds allow a player to take an improvement token and either place it immediately or save for later. Improvements come in 3 varieties – Fertilizer to help grow more bamboo, Panda enclosure to stop pandas eating on that tile and irrigation to make a tile irrigated without using irrigation channels. It’s important for Bamboo tiles to have access to water to grow.
The actions are pretty clear as well. Tile actions allow a player to take the top 3 tiles, pick one and play it. the remaining tiles are put back on the stack. A tile can only be placed adjacent to 2 other tiles or next to the pond. If there is an irrigation channel touching 1 side the new tile will sprout bamboo. Controlling the gardener allows a player to move the gardener any number of tiles in a straight line. His final place will allow bamboo to sprout in his tile and all adjacent tiles of that same colour that are irrigated. Irrigation actions allow a player to take an irrigation channel piece and either play immediately or place on his mat for use later. Controlling the panda allows the player to move a panda any number of tiles in a straight line. The final tile he lands on will have 1 bamboo section consumed. the controlling player keeps that section and can be used to score panda objectives. The last action is to pick a new objective card. Maximum of 6 cards in your hand.
Objectives are the scoring system in the game. There are 3 types – The tile objectives are easiest to score by creating patterns represented on your card on tiles being placed. At any point in your turn you can show the objective card to score points. Gardener objectives require a certain number of sections in a certain colour in a certain number of tiles to score points and panda objectives involve the panda eating the number and colour required on the card.
When 1 player has scored 7 objectives (in a 4 player game) he triggers the last round and also gains the Emperor Objective card worth 2 points. Every other player then has 1 round in order to score what he can. Once all players have gone the scores are added up and the victor is the gardener with the most points.
In our game last night the Emperor Card achieved victory for Raymond by 2 points over his brother.
A good fun family game with lots of twists and turns.


@Guildball – A @BeardedDice Review
Posted: March 22, 2014 in Gaming, KickstarterTags: Gaming, Guildball
So tonight with only a few hours before the Kickstarter ends we finally are able to get a demo game of Guildball in. The dollies have been cut out, the pitch is bare and ready for some blood, sweat and tears.
The Quick Start Rules provided seem quite clear, clean and simple language and notations of what certain key things mean for gameplay. So let’s dive right in!
First up, each team consists of 6 players, 4 normal sized players, 1 large player and 1 team mascot. With the Union players you have the choice of switching out players but for a simple demo we will stick with the standard out-of-the-box teams. Each player in the starting team is also a unique named character. This prevents spamming with certain models. The pitch is a standard sized wargames board – 3″x3″ in size with 1 team goal 6″ from each end line. Models are positioned at the start up to 10″ from their own end line. Whoever rolls highest can choose to kick or receive. The ball is placed at the kicking team’s goal, the ball gets kicked and we are under way!
As the kicking team I set up first followed by my opponent. Placing the ball at my goal I kicked off. To do so you place the ball on the field which must be over the half way line. The goal has a KICK value of 3 so 3 dice are rolled and a 4 or more will mean a successful kick. Unfortunately I placed the ball beyond the maximum range so the ball scattered. There is no pre-measuring in this game! The ball scattered out of play, was thrown in and came to rest in my half! I picked the ball up and gave it to my opponent.
Next the game starts. Rolling 1 D6 for initiative and adding any unspent Momentum Points, MP determines who has initiative to determine activation order. The player with initiative then allocates INFLUENCE to his models. Influence is what the models use to do actions during a turn. All models will generate an Influence pool which can then be used to give models their influence for the turn. There is a maximum number of influence a model can receive.
One thing that I was struggling with during the game was that models can move for free without spending Influence. This is just a holdover from other games where moving takes action points (see Malifaux,Infinity,Bushido etc). So a model with no influence can still move each turn. A model’s MOV stat is 2 numbers. A free move uses the lower value but if a model wishes to sprint they can remove 1 Influence when they activate to sprint in a straight line up to their maximum MOV. Models can only move once per turn.
So what can Influence be used for?
- If a model is Knocked Down it can spend 1 Inf to remove the condition but this counts as movement for the turn.
- A model can sprint in a straight line
- A model can charge up to it’s maximum MOV towards a target for 2 Inf. If this is successful he can attack once with +2 TAC bonus.
- A model can make an attack if there is a model in it’s Engagement Range – Typically 1 or 2″ bubble surrounding each model.
- A model can also perform some special plays if it spends the required amount of Influence.
So, with Influence applied and distributed the active player will nominate and activate 1 model. That model must then use all or some of his Influence and once finished his action ends. The opposing player then nominates one of his models and this goes back and forth until every model has taken a turn.
Hitting people – what could be better? If a model has an enemy model in it’s engagement range it can make an attack. Spending an Influence allows an attack or if the model charged it gets a free attack. The mechanics of hitting could not be easier. The attacker uses it’s TAC value to determine a dice pool. The defender has a DEF which tells the attacker what number he needs to roll – typically 3+,4+ etc. The attacker then rolls all his dice pool and any rolls under the target are misses. The defender then tells the Attacker their ARM value which subtracts from the number of successful hits. The final number of successes allows the attacker to unlock his playbook.
A playbook is a unique table for every model. Each successful hit unlocks another column in his playbook. A playbook represents damage inflicted, pushes of the attacker or defender, knock downs, tackles and special plays. This allows the attacker to decide what would be best for him in each situation based on the successes he has achieved. This is a very simple but incredibly deep outcome system.
How do I win? Simple, score 3 goals. That’s right the game is not just about beating up your opponent, there’s a small leather object that is key to the game. The ball is a 30mm base that can be controlled by models in base contact with it. If the ball ends up within 1″ of a model it snaps to base contact with that model. A model can spend 1 Inf to kick the ball. All models have a KICK value which is a number and a range (3/8″). This is the number of dice rolled to determine success and the maximum range they can kick. Whether the kick is to another player, a shot on goal or into the open the process is the same. The ball is placed at the intended target. The distance is measured to the location of the ball. If this is beyond the maximum range the ball is moved back to the maximum range. We now determine the success of the shot. The KICK value determines the dice pool. Generally speaking a roll of 4+ is a success. If a kicking model has enemy in engagement range the dice pool is reduced per enemy. If the receiver has enemy in engagement range the target number increases per enemy. This can be very tricky!
If successful the kicking team generate 1 Momentum Point as the crowd cheer them on. A receiver can immediately perform an out of turn action to spend the gained MP to make a move or take a shot on goal. This again is another kick and follows the above rules. If the shot is successful the team score 1 goal and their MP increases by 1 (by 2 if they roll 2 scores of 6).
First team to 3 goals wins. Once a goal is scored there is no reset or rest. The ball is immediately kicked back into play from the goal which can be beneficial for the defending team and they can try and make a fast break to score at the other end.
Howzat!
It’s the last few hours for Guildball. Just over 2 days remain and the guys at Guildball have released yet more stretch goals up to £100,000. These new stretches will add an additional character to each of the main guilds. I’m guessing we will soon hit the 8 players per guild that the Union Players have.
The £85k goal that was unlocked adds a new character to the Butchers – Meathook! Oh yes!

New Kickstarter Fall Schematic
Posted: March 19, 2014 in KickstarterTags: Fall Schematic, Kickstarter
This is an innovative and unique concept – tying together a digital RPG and a physical card game together to harness 2 universes in 1 joint experience. They have already broken their funding goal and with 35 days to go I can see a large number of stretch goals being broken if they play this correctly.
And with a new strategy where freemium games are concerned I think they can offer a new experience to digital game players.
And let’s not forget the Malifaux tie-in with limited edition sculpts and models. I will certainly be keeping an eye on this!
-

Lucius and his Hunter fight together as a Frame
-

A new Colette
-

Miss Direction for the Outcasts
#Malifaux #ToMB: Month 2
Posted: March 19, 2014 in Tale of Malifaux BloggersTags: Monsters, Nephilim, Pinball
So with Month 1 done, Month 2 rolls round. With my $20 from last month banked I now have $45 to spend this month. There are plenty of options open to Lilith but as I want to utilise the Nephilim part of the Neverborn faction there is only 1 logical choice for my next spend:
- The Nephilim box – $40
And there’s $5 left in the bank for next month. This box contains 3 models, not as much as the starter box but let’s have a look inside. The 3 models are:
- 2 Young Nephilim
- 1 Mature Nephilim
- All the cards required
They are quite big models as well! The young nephilim are based on 40mm bases and the huge Mature Nephilim is on a 50mm base with his monstrous wings extending behind him. On a matter of note I used tiny magnets on the wings so that they can be attached and unattached quickly which really helps storage.
Why Monsters?
Lilith and the Nephilim have access to an upgrade – Rapid Growth – which allows Terror Tots from Lilith’s base set to kill a model in range and immediately grow themselves into a Young Nephilim. This means for a 4SS you can get rid of an enemy model and replace your model with a 6SS model. This is perfect when combined with the For the Brood trigger on young nephilim, mature nephilim and Lilith and Barbaros. This all helps to get more back for your crew than you initially invested.
I am really looking forward to building and painting these models.
-

Nephilim box
#ToMB Lilith after Month 1
Posted: March 18, 2014 in Gaming, Tale of Malifaux BloggersTags: Barbaros, Lilith, Nephilim, Pinball
So it’s been a fun month with Lilith. I may have broken a few rules of #ToMB by using other models in my collection but the Lilith box comes in at 28/29SS at a push which does not meet minimum game size for including a Master.
So what have I learned? Let’s break down each model and see what they do:
Lilith
The Master of Malifaux. She can ignore LOS for CA and charges. With a Wk/Cg of 6 she has little movement bonuses for charging over walking. combine this with her bonuses on her sword when attacking and damaging for NOT charging means she either wants people within her melee range or at most take 1 walk and swing her sword with a better chance of hitting. She has Black Blood which is a Nephilim trait. Any Nephilim who take damage will inflict 1 Dg on all non-Nephilim models in 1″ range. Nice defensive ability. her Df is the highest in the game with a trigger that means if you miss her with melee you will be at -2Ml til the end of the turn. And lastly she ignores severe terrain when moving. Her only downside is 10 wounds which is a little fragile on a Master. Rush of Magic allows her to draw an extra card at the start of the turn. She can then discard a card down to her hand size.
Her spells are very nice. Tangle Shadows is perhaps the best one but does require a relatively high card with a Mask. She targets a model within 12″ (ignoring LOS) and switches places with a friendly model within 6″. Her standard 2″ melee range means she might then be able to take 2 swings with a ML 7 positive attack and damage. She will probably be killing most things with 2 swings. She has a (0) action that allows +1 Dg on all melee damage from charge actions if she moves through terrain.
The upgrades I have taken so far have been:
- Beckon Malifaux – Lilith gains Instinctual to do 2 different (0) actions which is handy since this upgrade gives her an additional (0) to create an Illusionary forest to block LOS to her but not for her. She can then charge through this to get the bonuses above.
- Living Blade – This extends her range of melee and gives her an ability to get a free swing if a model is pushed within 1″ of her. Which leads to
- Wicked Mistress – Gives Lilith a spell to make her push a model up to it’s charge towards this model. If it is pushed through severe terrain it tales damage and gains slow. If it ends within 1″ it can be targetted by Living Blade.
These 3 key upgrades give Lilith a lot of movement shenanigans and make her deadly within a 12-18″ range.
Barbaros
Lilith’s Henchman and protector. He is not quick but has Nimble so gains an extra move. He has Armour and Black Blood and a trigger when someone misses to inflict damage and push them away. His high Df adds to this making him pretty tough. He has a sword with decent range, decent Ml6 and standard damage spread. He can then push the target up to 4″ away afterwards which can then be combined with Nimble so if he is in a place he does not want to be he can hit once and move twice. He has (2) action that deals more damage, pushes the target further away then pushes him in Base contact after. His (0) Challenge allows him to put up a big bubble to protect those inside from damage as all actions need to pass a WP test or fail immediately.
- His main upgrade is the Gladiatus which is a (0) so it is either this or Challenge each turn. The Cyclone Crash is a Wk duel which if failed deals damage and pushes away. Those pushed into base contact with impassable terrain gain SLOW.
- Rapid Growth is a nice upgrade on Barbaros as this allows Terror Tots nearby to be able to grow into Young Nephilim when they kill a model.
- Obsidian Talons allows models who trigger the chance to cheat damage flips even if they are on negative flips. Normally you can NEVER cheat negative flips but Obsidian Talons grants the FLAY ability and this is perfect for a hard-hitting fragile crew. Kill other models before they kill you.
Terror Tots
These adorable little critters don’t look like much with low wounds and above average walk. They have a high defence and ignore severe terrain and have Black Blood. When they die any Nephilim in range may walk towards the model that killed it. They have an average Ml5 but where they excel is their tactical action – Sprint. This allows them to move, flip a card and if a Mask is flipped they move again. A cheat from your hand can guarantee these guys are up the other side of the board before the opponent knows what is happening. They have a built in ability called Pounce that allows them to get a free attack if a model ends a push in their engagement range. You may ask yourself why you would heal an opponent’s models rather than killing them but we will cover this later.
Cherub
He is the Ace up the sleeve when it comes to interacting with the board and other models. Other models within 3″ may take (2) Interact actions as (1) actions and (1) actions as (0) so this means for any scheme involving placing markers or interacting with other models means the models get a bonus move or action for free either after interacting or before. His ranged attacks deal little damage but hand out Slow conditions and he can make the area around any model hazardous which then means models take damage in it.
Playing Games
When deciding what models to take you need to know what Strategy you are playing and available schemes. If Breakthrough or Plant Evidence comes up I’m taking 2 or more Terror Tots and running them up the flank. If you declare this they only need to place 2 markers to guarantee 3VPs. Bodyguard works well with Barbaros with his Armour, 9 wounds and his inherent quickness. Protect Territory can be easily achieved with the speedy cherub helping models take (0) actions to interact and then do other things.
Lilith benefits greatly from being in the middle area of the board, her Mv6 and ability to see through terrain means that an opponent can have his best models swapped out and suddenly have Barbaros in his face and his best model now within string distance of Lilith’s blade.
Nephilim Pinball
Most Nephilim have a trigger on their melee weapons – For The Brood – built in. This allows them to instead of killing a model, instead heal it 1 wound, Paralyze it and push it 8″. This is essential for Nephilim Pinball. Basically a model kills an enemy, paralyzes it and then pushes it over to a terror tot who activates pounce and then kills the target and grows into a Young Nephilim. Perfect way to get enemy models off the board and get in heavy hitters to your force without spending on them at the start.
Conclusions
So I have had a blast playing Lilith over the last few weeks and learning her tricks. She is a very different master to what I am used to and can be played a few different ways to achieve victory. Next month I will be adding to the crew to get some more diversity in it.
Bob

